Guides
How To Install Our N64 Cartridge Doors And Region Free Bracket
In this guide, we’ll show you how to install our Nintendo 64 Region Free Bracket and colorful Cartridge Doors.
Disclaimer: This guide was written for informational purposes only. We assume no liability or responsibility for damaged equipment or for any injury you may incur attempting to replicate this guide. If you damage a 3D printed part during the install, please reach out and we can do a direct sale for a new part. However, no free replacements will be given for damage caused by your installation.
Shop items used in this install
What You’ll Need
- 4.5mm Security Bit (Gamebit)
- #2 Philips screwdriver
- Expansion Pak removal tool
01. Disassemble The Nintendo 64
In this section, you’ll need a 4.5mm Security Bit (Gamebit), #2 Philips screwdriver, and an Expansion Pak removal tool.


- Start by removing the Regular / Expansion Pak from the N64. Put the door and Pak aside.
- Flip the N64 over and remove the 6 4.5mm Gamebit screws on the bottom of the console.
- Carefully remove the N64’s top shell and flip it over.
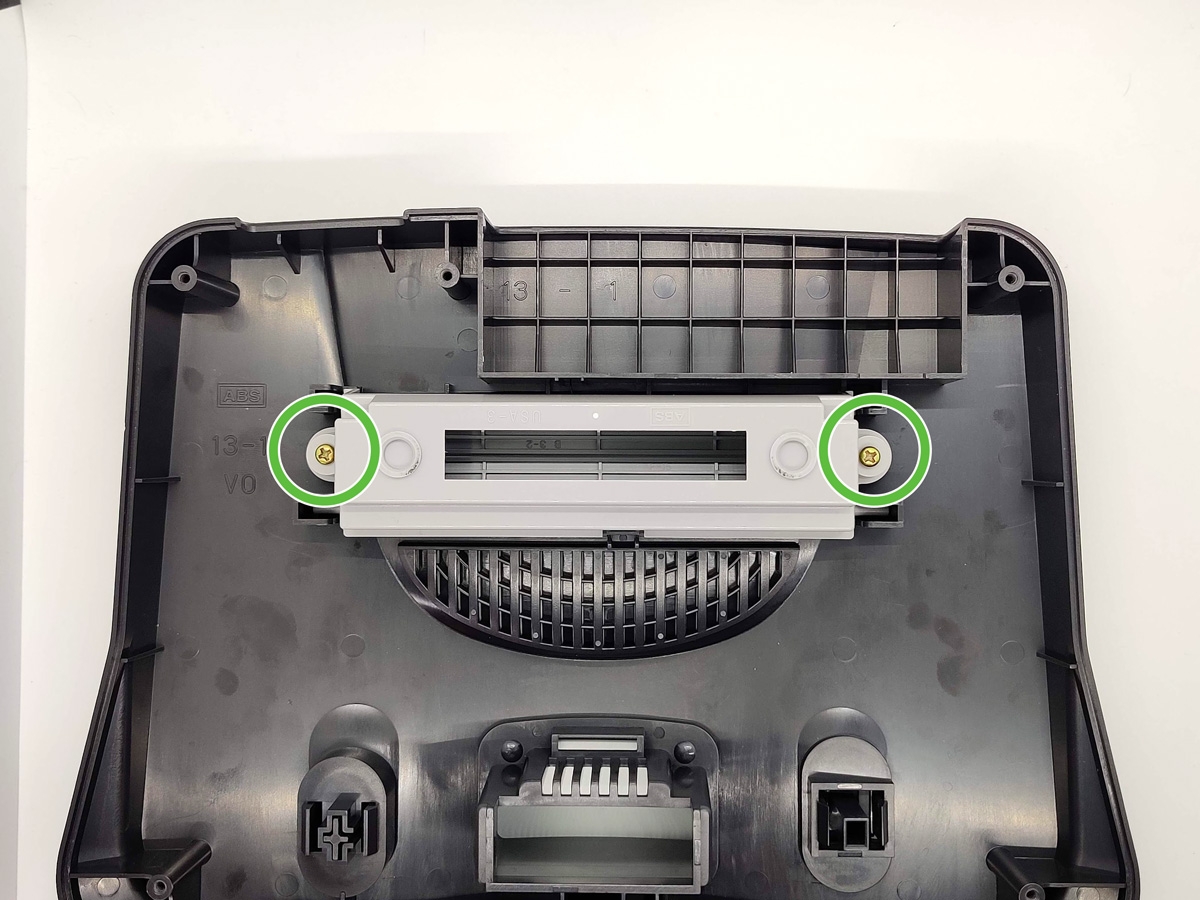
- Now remove the two Philips screws holding the OEM cartridge slot in place.
- Remove and set aside the OEM cartridge slot. The OEM cartridge doors will probably pop out but don’t worry we’ll handle them in the next step.
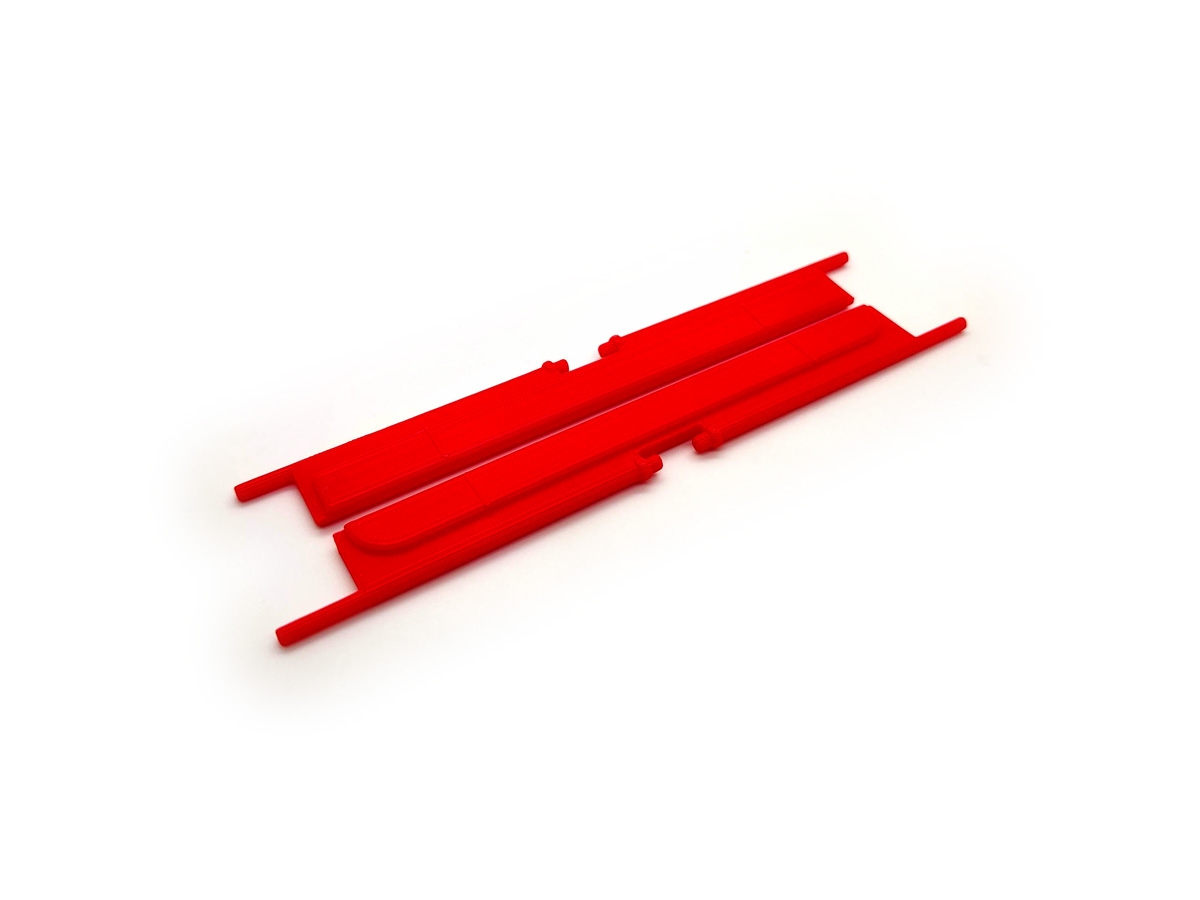
02. Prepping Cartridge Doors
In this section you will need the OEM Cartridge Doors, OEM Cartridge Door Springs, and 3D printed Cartridge Doors.


- Remove the OEM Cartridge Doors (if they haven’t already popped out).
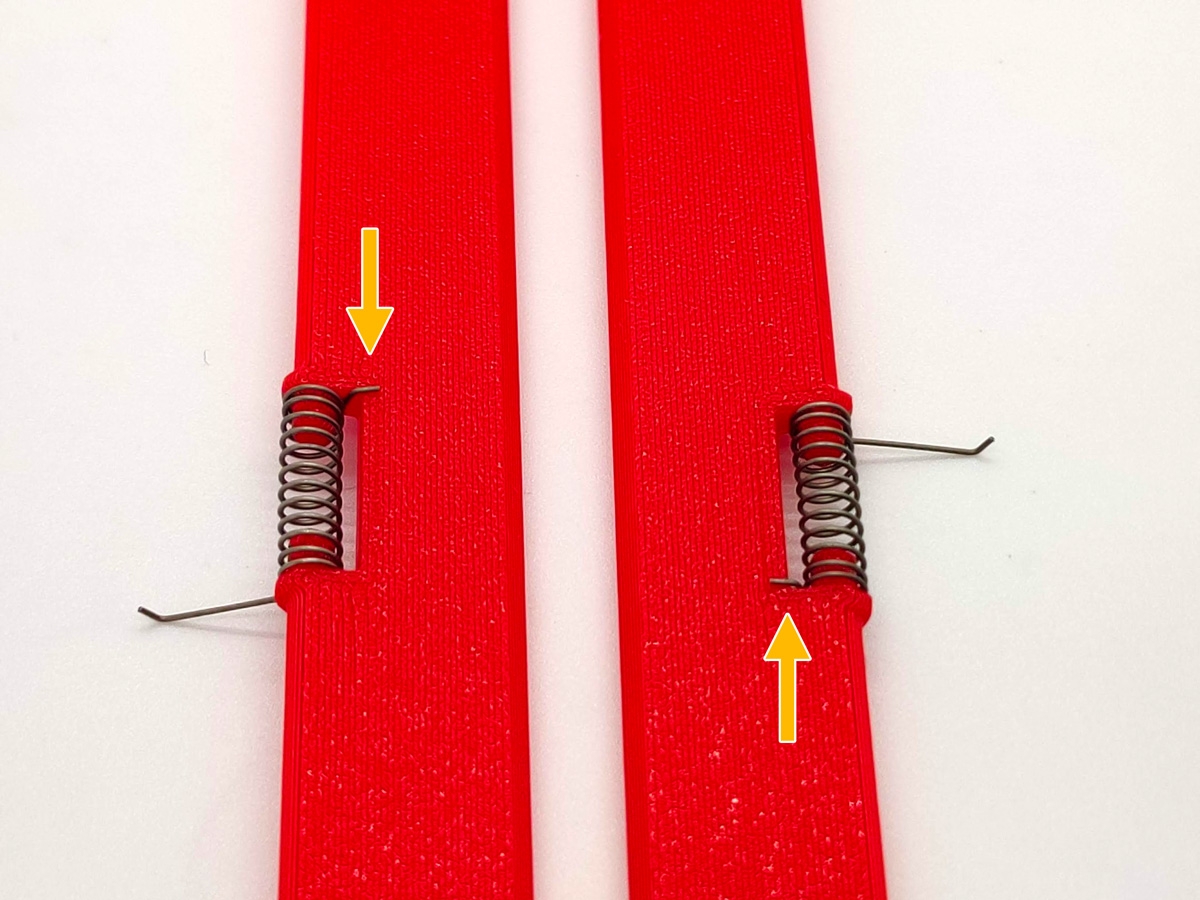
- Remove the two springs from the OEM Cartridge Doors.
- The springs have a long and short end to them. Basically, you want the short end toward the bottom of the Cartridge Doors.
- Slide one of the springs over the spring peg of the 3D printed cart door, short leg of the spring towards the bottom of the door.
- Do the same for the other side of the cart door.
- The springs should be oriented like this.
03. Installing the Region Free Bracket and Cartridge Doors
In this section you will need a #2 Philips screwdriver, the Region Free Bracket, and prepped 3D Printed Cartridge Doors.


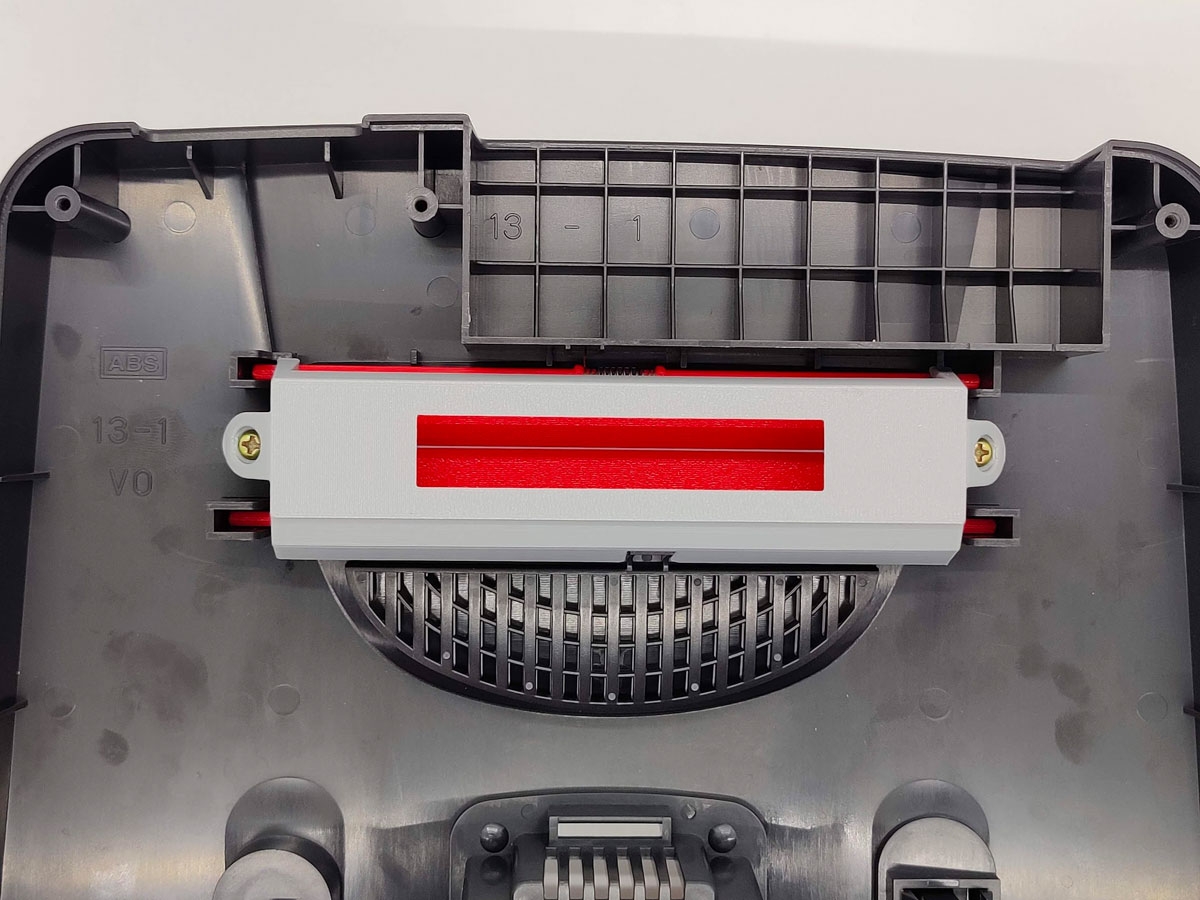

- Take the two 3D printed cartridge doors with springs installed and place them in the correct orientation shown in the photo. Use one finger to hold the doors in place.
- While holding the doors in place, drop the Region Free bracket in place with the large opening facing the back of the shell. Continue holding the Region Free bracket in place.
- While holding the Region Free bracket with one hand, screw down the opposite side with your #2 Philips screwdriver. Once one screw is in you can remove you hand and tighten down the second screw.
- Flip the top shell over and test the newly installed Cartridge Doors. If they stick, loosen the screws slightly.
04. Reassembly
In this section you will need the bottom of the N64, Top Shell of the N64, Expansion Pak (or regular Pak), 4.5mm security “Gamebit”, and a #2 Philips screwdriver.

- Take your newly “funtastic’d” top shell and carefully place it back on the bottom N64 shell. You may need to make sure the power switch is in the correct orientation to get it to slide back on nicely.
- Be careful when tightening down the Gamebits in this next step. N64s are notorious for having brittle screw posts. I highly suggest hand tightening these screws.
- Start by adding one Gamebit screw to one of the corners. Take your Gamebit and gently turn the screw in the counterclockwise direction (loosening) until you feel the screw drop a little. This indicates that the threads are now lined up as they were when you removed the screw. Doing this step helps preserve the plastic threads in the screw posts.
- Now slowly hand tighten the Gamebit. Repeat this for the remaining screws in a crisscross pattern (i.e. back left corner to front right corner and so on).
- Flip the N64 over and reinstall the Expansion / Regular Ram Pak.
- That’s it. Your N64 is now Region Free and has an awesome color accented Cartridge Slot!